Getting Started (iOS)
Buzzebees SDK makes it easy to build apps on your mobile. This gives you easy access to the Buzzebees platform using the REST API.
Requirements
- iOS 11.0 or higher
- Swift 5.3 or higher
The following steps are for adding Buzzebees SDK to your iOS project.
Set up Your Development Environment
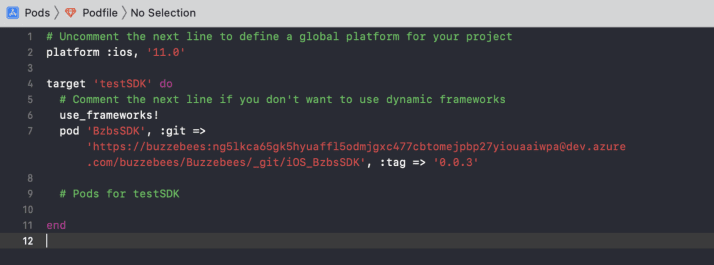
Set up your development environment before using Buzzebees SDK for iOS. Using pod file
- In the pod file, enter the URL:
https://buzzebees:{Token}@dev.azure.com/buzzebees/Buzzebees/_git/iOS_BzbsSDK
Configure Your Project
Configure the BzbsInfo.plist file with an XML snippet that contains data about your app.
- Create property list name
BzbsInfo.plist(Use this name) - Right click
BzbsInfo.plistand choose Open As > Source Code. - Copy and paste the following XML snippet into the body of your file .
<key>AppPrefix</key>
<key>ios_buzzebeesdemo</key>
<key>AppId</key>
<key>42425252261</key>
<key>BaseApiUrl</key>
<key>https://buzzebees-dev.azure-api.net</key>
<key>IsDebugMode</key>
<true/>
<key>SubscriptionKey</key>
<string>638c9e252d4e4b4ab0004a2d42a9d06f</string>- AppPrefix, AppId, SubscriptionKey. You can see it at the BackOffice
- AppPrefix is an application prefix used for app support version
- AppId is unique identifier of application
- SubscriptionKey is unique identifier of vendor
Connect Your App Delegate
Adding import BzbsSDK in AppDelegate.swift method with the following code. This code initializes the SDK when your app launches.
import BzbsSDK- Adding code BzbsSDK setup for inititalizes the SDK in
didFinishLaunchingWithOptionsmethod
func application(_ application: UIApplication, didFinishLaunchingWithOptions launchOptions: [UIApplication.LaunchOptionsKey: Any]?) -> Bool {
     // Override point for customization after application launch.
     BzbsSDK.shared.setup { logString in
        print(logString)
     }
     return true
}